Saturday, 23 April 2016

Reassembeled Lesson Plans (Air resistance)


 If you have read my previous posts, you will know that I decided to omit any narrative elements from this lesson and instead rely on the game elements I have shown below instead. Not every gamified session requires narrative and when a session already contains heavy gamification elements then it is perfectly acceptable to build on what is already there and attempt to draw out the gamification elements to boost their effectiveness.

For this post I would like to present my gamified lesson plan but also take the time to highlight the already gamified sections of the original lesson plan which I have chosen to draw out and enhance. For the purpose of this I will highlight elements I have added in blue and elements of existing gamification in green.

Session D: Air Resistance

Programme of study:   Explain that unsupported objects fall towards the Earth because of the force of gravity acting between the Earth and the falling object
Identify the effects of air resistance, water resistance and friction, that act between moving surfaces

Working scientifically:Plan enquiries, including recognising and controlling variables where                                                   necessary
Take measurements with increasing accuracy and precision
Record results using line graphs
Identify scientific evidence that has been used to support ideas

Resources needed:      Scrap A4 paper, stop watch, parachute, Hall or playground time, paper clips, scissors, stopwatches, sycamore or ash seeds. Access to internet

                                    Badges or stickers will be required if you plan on presenting the “beat the record” section at the end of this plan.

Whole class teaching:
Remind the children of their friction experiments from the previous session and the fact that when two surfaces come into contact with each other friction occurs. If moving over a surface is difficult then surely moving through air is easier? Briefly discuss with the children situations where they have felt the ‘force’ of moving air – running into the breeze on a windy day, holding an umbrella being pushed inside out, cycling on a windy day, etc.

Give a volunteer child a sheet of A4 scrap paper & ask them to drop it on command from shoulder height. Use a stopwatch to record how long it takes to fall to the ground. Record time on f/c. What happens if you change the shape of the sheet? Does a scrunched ball fall faster or slower than the flat sheet? What about other shapes (must use whole of A4 sheet each time)? Repeat with a few other children.

Take a large parachute like those used for circle time activities (in the Hall or playground). With all the children standing in a circle start to raise and lower the parachute together. What do they notice? – It’s hard work; the parachute feels heavier than it did when it was still. Allow a few children at a time to lie under the parachute while it is being raised & lowered. What do they feel? – The air rushing out and being drawn into the parachute.

Present the children with four balls the same size - golf ball, squash ball, table tennis ball and a bouncy ball – all same size, weigh those using digital scales - they are all the same size but each has a different mass. Record on f/c. Ask the children to vote for which will fall to the ground fastest when dropped from the same height. All have the same force acting on them – gravity. Record the children’s predictions as a tally on the board. Ask four children to come to the front to drop them simultaneously from the same height. What do the children notice? Repeat with several more drops… the balls fall at same rate when dropped. Why is this? – As the shape of the balls is the same they are all affected by the slowing air resistance in the same way. It is thought that in 1590 Galileo climbed to the top of the leaning Tower of Pisa and performed the same ball drop enquiry (& feather & ball enquiry)! Allow children to help Galileo carry out his enquiry once more by going to http://www.planetseed.com/node/20129 orhttp://www.planetseed.com/popup/41280 (more detail).  He was the first to conclude that all objects would fall at the same rate/speed without air. Finding an environment without air (a vacuum) is hard although space is the perfect testing ground! See a feather and a hammer fall at the same speed athttp://nssdc.gsfc.nasa.gov/planetary/lunar/apollo_15_feather_drop.html. 

Group activities:
Tell the children that they are going to plan and then carry out their own enquiry to explore how spinners weighted with paper clips fall when dropped. Before starting they must agree in pairs on the question they are going to investigate through discussion of the Discussion Drawing (session resource). How does the number of paper clips affect the time the spinner takes to fall? How does the height a spinner is dropped from, affect the time it takes to fall? How does the size of the spinner affect the time it takes to fall?

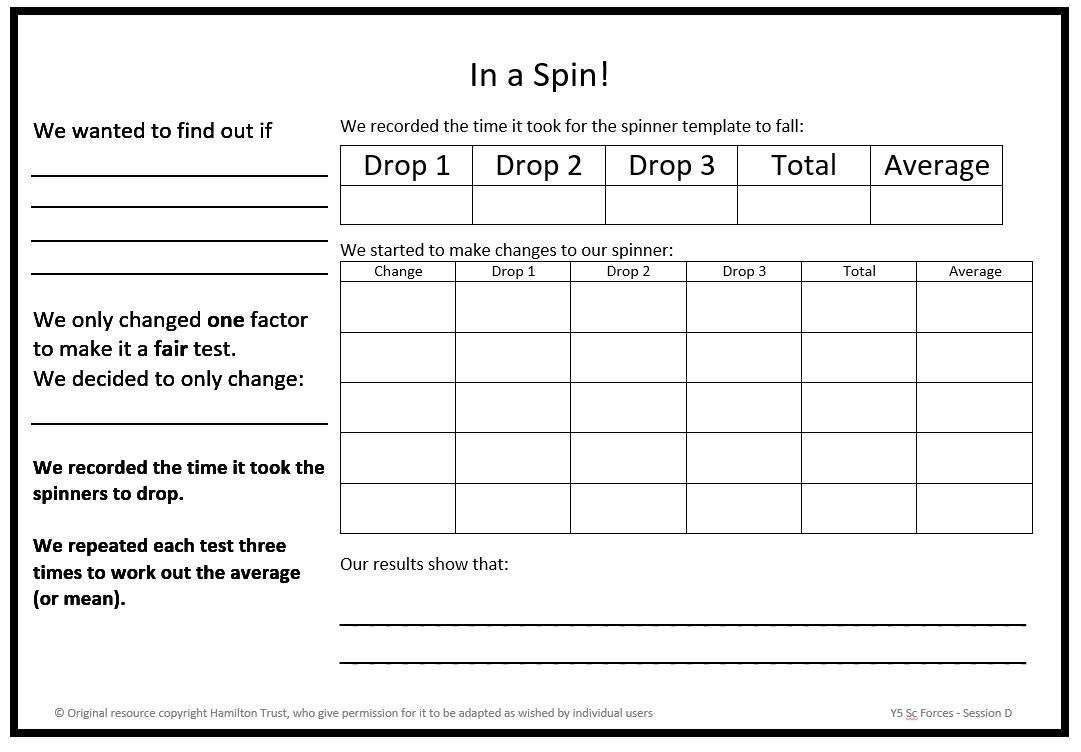
Allow the children to consider how they are going to carry out their experiment to attempt to answer their questions. Remind the children that to be a fair test they can only change one factor and must keep all others the same. Discuss with each pair the factor that will change – greater mass, more height, etc.Allow the children to carry out their experiment, repeating and recording all measurements as they go. Make suggestions to groups investigating drop heights so that this can be carried out safely. Allow students to use template to create spinners (session resource – this can be photocopied larger for students who choose the option of increasing the area of paper used). Students should cut along the dotted lines before bending one side strip forwards, one backwards to create the blades, and folding the main body to make a triple thickness for fixing the paper clips to.

When the enquiry has been carried out, support the children as they create a graph and describe any patterns created by their results. Plot a line graph. Describe the pattern in their results, in the form: the larger the paper spinner, the slower it fell; the more paper clips added, the quicker it fell. Encourage the children to draw out a conclusion from their results, e.g. air pushes upwards and gravity pulls down; it is the size of the air resistance force that causes objects to fall at different rates, etc.

Inform the learners that now they will have a competition. In their pairs, they will use the information they have gained from their experiments to design a spinner that, when released from the same height, will take the longest time from release to hit the floor. The rules are simple, all spinners will be released from the same height and the stop watch will start from when the spinner is released and stop the moment it touches the ground. Spinners cannot be thrown, only dropped from a static position (to help with this the teacher may release each of the spinners in turn) The students can make any shape spinner they wish but can only use paperclips as additional weight and cannot use any more than a single A4 sheet of paper. Each team may have as many test drops as they wish during their allotted making time prior to the competition starting.

After each spinner is dropped and its time recorded, give explanatory feedback to help explain different behaviours due to shape and weight placement etc. When all times have been measured, the winners are determined by being the team with the longest time on the leaderboard.

When the winners have been determined, award points to each of that team’s members and, if time permits, leaners can be given another chance to redesign their spinners and try again. On this second attempt do not offer points but instead badges/stickers for any teams which break the class record set by the initial winners.


Lesson Materials


All of the green text above is existing text from the original document which I believe to be
elements of gamification already present. It is these elements I have chosen to bring out by
creating the competition at the end of the lesson. The elements which are present include
objectives, goals, cooperation, leaderboards, failure, replayability, and scoring. A strong
argument can be made for exploration, experimentation, and autonomy being heavy influences
within this document also.

I have chosen to draw out the cooperation, competition, and scoring with my additional game at
the close of the session.


Reassembeled Lesson Plans (Friction)

Below you can find my second recompiled lesson plan. As you can see some of the sections remain unchanged however the class teaching is where the gamification techneques have been implemented. 

Session C: Friction

Programme of study: Identify the effects of air resistance, water resistance and friction, that act between moving surfaces

Working scientifically:
Plan enquiries, including recognising and controlling variables where necessary
Take measurements, using a range of scientific equipment, with increasing accuracy and precision
Record data and results using bar graphs
Report findings, including oral explanations of results

Resources needed:
Sports shoes/trainers (1 each) that children bring in. Access to different floor surfaces, force meters. Access to internet
(Gamified extras if required: Badges, Stamps, or stickers)

Whole class teaching:
Show the class the results of an enquiry that a group of children carried out using a car on a ramp (shown below). Ask why does the car travel further on some surfaces than on others? Do children know the name of the force that is acting? Friction. How can we define friction? The resistance that one surface or object encounters when moving over another or the action of one object rubbing against another, which tends to slow it down or stop it completely.

Car on a Slope Enquiry
Some children carried out an experiment to find out what happens when a car rolls down a slope covered in different surfaces. They measured how far the car rolled each time.


Here are their results:

Surface
Distance rolled in cm
Wood
98 cm
Fabric
8 cm
Bubble Wrap
20 cm
Paper
72 cm
Rubber
42 cm


On which surface did the car roll the furthest? On which surface did it roll the least distance?
Why does the car roll further on some surfaces than others?

After the first discussion about the car experiment read the following:

James is a young boy who loves to run, he wants to run as fast as he possibly can. First of all, James tries running on the wet grass but he slips over, then he tries to run on the beach, but his feet keep slipping through the sand. James decides to come to you all for help, he wants to know what the best surface would be for him to run on.

Open discussion about different types of surfaces starting with the common such as tarmac, wood etc. and don’t be afraid to throw in some silly hypothetical surfaces such as jelly. This is just an opening to incorporate the discussion task into the narrative. After this discussion proceed to read the following:

James now knows what surfaces to run on, but he is not allowed running shoes when he’s at school. In groups of 3-4, James would like you all to pick which of your shoes have the best grip from their soles tread. To make it interesting James will give a point for each member of the team with the highest friction shoe. Teams only get to pick once so choose wisely and remember to record your results when testing.

At this point hand out Newton meters and start the clock. At the end of the 15 minuets (scale to fit time left in the lesson).
After the time is up test the nominated shoes for each team and record the measurements on the board to help promote engagement and excitement for the competition. Once all scores have been recorded read out the following:

After seeing the results James has chosen (Students Name)’s shoes to run in as they offer the most friction and will enable him to run the fastest. After years of running, James eventually grew up to be an Olympic runner all thanks to the class’ help.

When this has finished award the points to each winning team member.


Group activities:
Adult-led activity:
Tell the children that they are going to test their sports shoe to see which surfaces their shoe works best on. As a class decide on up to six contrasting floor surfaces – examples; grass, tile, carpet, polished wood, concrete, gravel. Ask the children to predict on which surface their shoe will be hardest to pull - most force required = most friction – encourage children to try to give scientific reasons, not simply observations based on daily life. In groups compare shoes. Which will have the best grip – most force required = most friction? Children write down their predictions (session resource). Plan the method as a class – which factors will need to stay the same to ensure that this will be a fair test? Work together in small groups. During the test children should record their measurements on the table using the session resource, draw bar charts to make the data easier to interpret and discuss the results. Children should make three measurements each time and calculate the mean (average) by adding all three measurements and dividing by three.  If one measurement differs greatly from the other two an extra measurement should be taken instead to check. What do the results show? Which surface allowed the shoe to move with less effort due to less friction? Was this the same surface for everyone’s shoe? Which surface required the most effort to get the shoe to move due to increased friction between the show and the surface? Discuss the results as a whole, giving individual children the opportunity to present their group’s findings. Whose shoe would provide the best grip in each location? What is it about the shoe with the best grip that causes it to generate friction when in contact with the floor? Would children make any changes to their enquiry if they did it again?

I can:  
1. Define friction as a force acting between moving surfaces.
2. Carry out a fair test; recording accurate results in a table.

3. Compare my results with others and draw conclusions.

Thursday, 21 April 2016

Reassembled Leson Plans (Opposing Forces)

After adding gameification elements and narative necessary I now need to compile what I have back into a deliverable package which acchieves all the origonal learning outcomes. For this I will present below the newly gamified documents and then, in a future post, hold a comparison between the gamified document and the "un-gamified" one. I would like however to take the time here to note that where I say un-gamified, it does not mean that the origonal does not hold and elements of gamification. So with that in mind I will also be highlighting the elemnts of gamification that were already present within the origonal plans and how I encorporated them into my version of the gamified documents.


Session B

Opposing forces

Programme of study: Explain that unsupported objects fall towards the Earth because of the force of gravity acting between the Earth and the falling object.

Working scientifically: Plan enquiries, Report findings from enquiries.

Resources needed: Book, two sets of kitchen scales, video, digital camera, PE equipment. Access to internet
                                       Pens/Pencils, Paper, Rulers (printed picture of stone tablet if able (one per learner))
                                       (Gamified extras if required: Badges, Stamps, or stickers)

Whole class teaching:

Welcome the class with the following introduction:

You are on a school trip with Mrs Pennington, your history teacher, to the natural history museum. The day is nearing its end and the class finally reaches the ancient Egyptian exhibition. Suddenly the doors slam closed around you and lock tight, sealing you and your class inside. Mrs Pennington suddenly turns to stone and a mysterious glowing text appears floating in front of her. It says “If you wish to save your teacher, you must tell me why an apples fall from trees”

Once this has been read, ask the learners to save the teacher and answer the question. Award points for correct facts given about gravity and (if it had not been previous brought up by a learner) lead the learners by telling them the story of Sir Isaac Newton’s Apple. Distribute “Worksheet 1: Sir Isaac Newton” (shown below) for students to read more about Newton. Once the discussion is drawn to a close and you are satisfied with the learners understanding read the following:

The glowing text disappears and Mrs Pennington returns to her normal self once more. The doors however are still locked tight and you see the warm red of the afternoon’s sky through the overhead windows, the sun is setting. On the far wall rests stone statue, a second paragraph of glowing text appears above. It reads “Well done, but you are not safe yet. Now show how gravity is affecting this object in your world. If you do not before the sun sets, you will be sealed in here forever.” Mrs Pennington in a panic looks at her watch and tells you all that you only have 10 minutes until the sun sets.

Hands out worksheets with a simple picture of the stone statue resting on a shelf on the wall (or have the learners draw it themselves on plain paper). The ask learners to show using pencils and rulers what forces are acting on the statue. Learners should not be given any advice on this for the first 5 minutes. After the first 5 minutes stop the class and ask learners to present their solutions. Points should be awarded to any students who have correctly drawn arrows showing both gravity and up thrust pointing the correct direction and (roughly) the same size. Diagnostic feedback should be given for any incorrect answers explaining how and why it should be drawn the correct way.  Award a badge to any learners who correctly identify any other forces at work and depict them accurately. Tell the learners that they have a further 5 minutes remaining to complete the task and escape. When they have all finished pick the best example of work and read the following:

Mrs Pennington traces the diagram into the soft sand in front of the statue, the glowing text fades and three doors beside the statue swing wide open. All of the students run to escape but the teacher quickly jumps in the way screaming “WAIT!” You peer through the door and see that the floor, while very much there, seems odd. Each door has a different floor behind it and on closer inspection you see that they are all made of different materials. The first to the left is made of soft sand. The second in the centre is made from rotted wood. Finally, the floor to the right is made of metal. Which one do you choose to make your escape and why?

Now lead a discussion about why some surfaces would not be ideal for walking on and why. Show using diagrams that water and glass will not have as much force to resist gravity and may give way under the weight of the students. Feel free to use other substances but avoid the three used in the stories question. Ask learners to wright down on the work sheets which route the students should take to escape and then have all of them reveal their answers at the same time. Select examples of work and ask learners explain their reasoning, offer a point to each student with the correct answer and then finally read the following:

Mrs Pennington tells all the learners to use the door on the far right and to follow her.
(If all students chose the correct path)
All of the learner’s hurry to keep up with her and make it to the exit as the shutters were starting to close, the security guard sees you all and says “Oh, you’re just in time! You don’t want to get locked in here over night, strange things happen to those left behind.” The class exits quickly through the double doors and head back home.
(else if some of the students chose to use a different path, let them)
The students that did not follow Mrs Pennington head through their chosen doors. Students who went through the first door on the left, find themselves stuck in the sand and slowly sinking. Those who chose the middle door rush on through only to find the rotten planks gave way and they start to fall. Nobody knows what has happened to them.

Any learners who successfully escaped the museum get an “ESCAPED!” stamp/sticker on their work sheets and an extra point each. Then conclude the experience by summarising what has been learned in that session and congratulates all the escapees. 

Who was Sir Isaac Newton?


Sir Isaac Newton is one of the greatest scientists who have ever lived. Born in 1642 Isaac Newton had a lasting impact on astronomy, physics, and mathematics. His father died before he was born and so Newton had a difficult childhood. His mother remarried when he was just three, and he was then sent to live with his grandmother. After his stepfather died, his mother brought him home to Woolsthorpe in Lincolnshire, where she wanted him to become a farmer. However an uncle noticed how clever he was and he eventually made it to Trinity College, Cambridge University.
Many of his great ideas came in 1665-66, when he spent time back at Woolsthorpe while Cambridge was closed because of the plague. Among his many achievements were the invention of the reflecting telescope, the basic design behind all large telescopes used today; the invention of some mathematics known as calculus, which is very useful in science today; the discovery of the three laws of motion; and the development of the law of universal gravitation: the theory that all objects fall at the same rate without air resistance.
When still in his mid-twenties, he was named Lucasian Professor of Mathematics at Cambridge University, a post now held by Stephen Hawking.
He died in 1727 and is buried in Westminster Abbey.

Sir Isaac Newton’s Laws of Motion
Newton was a clever man.
An avid scientific fan.
He questioned many things he saw.
Like ones we had no answers for.
He thought them through right to their cores.
Then gave us many handy laws.
Newton’s First Law Of Motion:
Without a force of push or pull
an object will remain quite still.
With just one push at just one time
that object moves in one straight line.
Newton’s Second Law Of Motion:
A bigger Force accelerates
an object that is heavy-weight.
While objects of a smaller mass
don’t need much Force to move them fast.
So Newton noticed they obey
that Force will equal m times a.
Newton’s Third Law Of Motion:
Now bend a stick. Before it cracks
you’ll feel its force of pushing back.
For every action there will be
an equal one – opposingly.
Without his formulas in place
we’d soon get lost in outer space.
So Isaac’s Laws help us traverse
the reaches of our universe.
by Celia Berrell


I can:  
1. Talk about Sir Isaac Newton and some of his discoveries.
2. Create a diagram/picture showing forces acting in different directions.
3. Understand that other scientists have developed Newton’s ideas further.


This leson plan can now be delivered, however I would like to take the time in my next post to explain the break down of elements further, the why, and also point out the sections of the origonal that I have brought forward. Again, once I have finished this process for all four lessons I will then revisit the origonals for a comparitive review and to also point out which parts of the origonals were inherantly gamified.

Sunday, 10 April 2016

Adding Narrative to Water Resistance

For this final example I wanted to do another full narrative for the lesson. Again I used the Story Cubes to help the creative process along. Here are my results.


With this I came up with a simple narrative which builds on the previous museum story in which the class have now gone on a geography trip to the Amazon Rainforest. On this trip the class finds themselves being chased by aggressive indigenous people. They find an area with varying types of water/swamp land and they must choose work out which is the safest way to cross. After successfully negotiating the first task, they will be faced with a river to cross before the indigenous people find them. Here a reminder of the tasks I have modified along with the Narrative below.

Water Resistance

Objectives
Elements
Demonstrate how different liquids have different properties on small objects such as pennies

(Combined with)

Drop two balls from the same height on to the table. One through air and the other through water (via tank) to show the effects of up thrust
Objective is to show learners that different liquids have different up thrust and therefore oppose gravity to different degrees.
Competition students will predict which liquids will have a greater resistance to gravity (cause the penny to drop slowest)
Explanatory Feedback
NO POINTS as this would undermine the value of point acquisition.
Story/Narrative could be of benefit here however this will be covered off at a later date.
Design I boat that both floats, and moves the fastest/farthest when pushed through the water.
Goal to create a boat that both floats indefinitely and is able to cross the greatest distance with a single push start.
Rules are important here as there are a lot of variables. Firstly the push should be done by the teacher to keep it as close to fair as possible, this is not a contest of strength. The boat must be made from a pre-selected assortment of materials (wood, plasticine, tin foil etc.)
Cooperation by having teams work on the task together.
Competition again through only having control of their own mastery of the task as opposed to conflict.
Diagnostic Feedback is required here to explain and diagnose why some boats fail where other succeed.
Completion Achievements for any team that complete the task.
Badges for any student that manages to beat a pre-determined distance (it should be an exceptional distance bench marked prior to the lessons start.
Points and Leaderboards again for the students who come in first, second, and last.
Failure is easily worked in here as it allows for students who “sink” their boats to try again at the end. This can also be worked in as a round system with points awarded for each round with the ultimate winner being determined at the end by the score. This works in Score and Replayability.

Act 1

It has been two months since the museum incident with the class and Mrs Pennington and to make up for the upset caused by this, the museum owners have paid for an all expenses trip to see the Amazon Rainforest in in Brazil. No more than two days passed before you and your class find themselves lost in the jungle being chased by angry indigenous hunters! Somehow you have all managed to get a little way ahead of the hunters but now find yourselves on the edge of a waste deep swamp. You can see several different paths to the other side, all of them involve wading waste deep through different areas of water and mud. How do you decide which path will let you cross the fastest and let you escape the hunters?

First of all speak to the class and get their ideas on factors that could slow them down when moving through a liquid such as water or swamp that wouldn't normally matter when running on solid ground. If a learner mentions water resistance then focus and drill down on the subject. If not then work water resistance into the discussion. After this move on to explain/discuss that different liquids can have different levels of resistance. Demonstrate this taking several sealed jars with different liquids and a penny in, letting the pennies all rest on the bottom and then turning the jars over to watch the penny fall. Ask students what they notice. Explain that because each liquid has a different level of resistance, the pennies fall at different rates. Ask students to think of a way, in the jungle, they could test to see which liquid would be easiest to move through with the least amount of resistance.

Explain that if they took rocks from the ground and dropped them in the liquids they can see that the fastest sinking rock would be the liquid with the least resistance. Demonstrate this by dropping a stone in each of two containers, one containing water and the other something thicker such as honey or syrup. Ask a learner to assist by dropping one of the stones and use your spare hand to drop a third stone onto the table through the air. Re-emphasise how the first stone to hit the ground experienced only minimal wind resistance until it hit the table, how the water rock has up thrust working against gravity causing it to fall slower, and that the syrup rock took the longest as syrup had more up thrust and more resistance than the water. After this proceed to act 2.

Act 2

The class quickly grab as many rocks and stones as they can carry and start dropping them in the different areas. Some sank straight to the bottom, others hit the surface and sank much slower. These areas should be avoided as walking through them will be much harder and will slow you down. The class quickly find the fastest rout through the swampland and make it to the other side. They can no longer hear the shouts of hunters, they must have given up when they got to the swamp and turned back. You all breathe a sigh of relief. Mrs Pennington suddenly speaks up, “Class I can hear running water, I remember on the map that the camp beside a river, we should all head towards the sound and see what we find.” After several minuets walk you all come across a large river and amazingly, across on the other side you can see your camp! There is only one problem, there is no bridge across. You will all need to build a raft to cross. Using what you now know about water and air resistance, in teams you must construct a boat or raft that will both float, and travel fast through the water.

Ask the learners to form groups of their own choosing to foster autonomy and then give them 20 minutes (scale to fit the lesson time remaining) to build a boat using the materials provided (paper, plasticine, tin foil, tape  etc.) Explain the rules of the challenge, the boat MUST float and will be pushed by the teacher at the same force each time. The winners will be the boat the travels the farthest OR in the event that more than one team reaches the other side, the boat that reaches the other side the quickest. Remind learners about how the spinners changed depending on where weight was applied and also encourage learners to think about how the shape of the boat can change how much resistance the boat experiences in the water.

After the time is up, take each teams boat in turn and push each across the tank taking care to push each boat with the same force. Have a student time each attempt with a stop watch to find out how long it takes the boats to reach the other side (if at all) and record this time down on a visible table (white board etc.) If a boat does not make it to the other side, measure its distance travelled and record that instead. If any boats sink (and time permits) allow those teams to go away for a short time to work on their boat and try again. Once all the results have been taken, award the winning team members points and award badges to any team members whose boat made it to the other side, badges for the achievement. Remember to give plenty of feedback to diagnose why boats either failed or succeeded. After this proceed to Act 3.   

Act 3

Congratulations, all of the students in boats they reached the other side made is safely back to camp. Any students in boats that failed to reach the other side luckily were picked up farther down the river by search parties and brought back to camp. The whole class managed to get over their ordeal and enjoyed the rest of their holiday in piece.


This lesson is designed to foster team work as well as completion while offering plenty of autonomy for the leaners to explore and experiment with the subject of water resistance.

Friday, 8 April 2016

Omitting Narrative (Air Resistance)

Air Resistance

Objectives
Elements
Experiment with paperclips and spinners to show how shape, size, and weight distribution can change the effects of wind resistance
Goal to keep the spinner in the air the longest (longest time from release to it touching the ground)
Rules all spinners will be released at the same height, they cannot exceed one A4 piece of paper, Must only use paperclips as extra weight. No throwing of spinners.
Competition as students cannot affect each other’s outcomes and thus can only improve their own mastery of their design.
Cooperation can be used if groups are used rather than individuals.
Explanatory Feedback to justify why some spinners succeed and others fail.
Points earned by the winning students or teams for their leaderboard.
Replayability is created by letting students have test flights of their spinners while creating them.
Scoring is done via times. The highest score wins.


Not all tasks need narrative, this lesson relies heavily on the game elements currently and this will keep students engaged with the subject materials. Because of this adding narrative could over complicate the lesson and result in students loosing interest. For this reason I will leave this lesson as it is and recompile it for the next set of posts. 

Adding Narrative to Friction

With lessons already containing strong narrative pieces it can be a far more effective to add narrative only to specific tasks. In this lesson I would like to add narrative the discussion and testing of the shoes. I am going to add a simple story of a runner who wants to find the best surface to run on.
At this point if there is time remaining, you can repeat the testing with individuals shoes who have yet to be tested. Any student whose shoe beats the winning shoes score should receive a badge as an achievement.

Friction

Objectives
Elements
Discus the results of the car experiment
Explanatory Feedback (Natural)
Points for correct facts or answers to questions posed.
Discuss and compare different surface types to test a sports shoe grip on.

(Combined with)

Test students shoes with the newton meter
Objective to find the tread with the most friction
Rules students must (after discussion) individually or as groups choose which tread will have the most resistance. Students can only make one choice and cannot change it once it is on the board.
Competition is created between students as each shoe is tested.
Explanatory or Diagnostic Feedback to help explain why one shoe is better than another and if required, diagnose why some students may have predicted wrong.
Points for correct answers. Consider a podium system with 3 points for the winners, 2 for the 2nd and 1 for the 3rd shoe with the most friction.
Replayability if student would like to take another selection of shoes and try again.


 After the first discussion about the car experiment read the following:

Act 1
James is a young boy who loves to run, he wants to run as fast as he possibly can. First of all James tries running on the wet grass but he slips over, then he tries to run on the beach, but his feet keep slipping through the sand. James decides to come to you all for help, he wants to know what the best surface would be for him to run on.

Open to a discussion about different types of surfaces starting with the common such as tarmac, wood etc. and don’t be afraid to throw in some silly hypothetical surfaces such as jelly. This is just an opening to incorporate the discussion task into the narrative. After this discussion proceed to act 2.

Act 2
James now knows what surfaces to run on, but he is not allowed running shoes when he’s at school. In groups of 3-4, James would like you all to pick which of your shoes have the best grip from their soles tread. To make it interesting James will give a point for each member of the team with the highest friction shoe. Teams only get to pick once so choose wisely and remember to record your results when testing.

At this point hand out Newton meters and start the clock. At the end of the 15 minuets (scale to fit time left in the lesson) move on to act 3.

Act 3

Test the nominated shoes for each team and record the measurements on the board to help promote engagement and excitement for the competition. When this has finished announce the winners and award the points to each winning team member.


James has chosen (Students Name)’s shoes to run in as they offer the most friction and will enable him to run the fastest. After years of running as fast as he could, James eventually grew up to be an Olympic runner all thanks to the class’ help.